Unity Colliders vs Triggers: The Game Developer's Guide to Making Objects Talk to Each Other
Master the fundamental difference between physical interactions and event-based detection in Unity game development
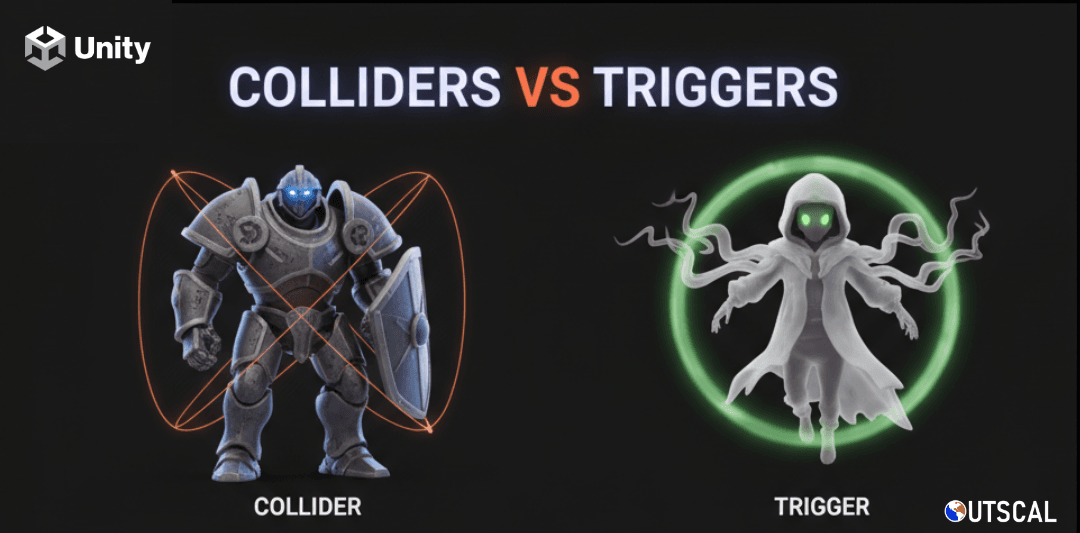
Here's the thing about Unity Colliders vs Triggers - when I first started learning game development at CMU, I spent way too many late nights confused about when to use which. You've got these invisible boxes that can either stop objects cold or let them pass right through while triggering events. It sounds simple until you're staring at your screen wondering why your player keeps bouncing off collectible coins instead of picking them up.
I remember this one project where I was building a simple platformer. The player would run into coins and just... bounce off them like they were brick walls. Took me embarrassingly long to realize I'd forgotten to check the "Is Trigger" box. That moment taught me something crucial: mastering Unity Colliders vs Triggers isn't just about memorizing which checkbox to tick - it's about understanding the fundamental difference between physical interactions and event-based detection.
Table of Contents
- What Actually Happens When Objects Meet in Unity?
- The Building Blocks Every Game Developer Should Know
- Your First Line of Defense: OnCollisionEnter
- The Invisible Event Handler: OnTriggerEnter
- When Should You Use What? The Real-World Comparison
- Why This Knowledge Will Transform Your Game Development
- Pro Tips That Actually Matter
- How The Pros Do It: Three Games That Got It Right
- Blueprint 1: Building Your First Collectible Coin
- Blueprint 2: Creating a Damage Zone That Actually Works
- Blueprint 3: Making Objects Bounce Like They Should
- Your Next Steps Beyond Unity Colliders vs Triggers
What Actually Happens When Objects Meet in Unity?
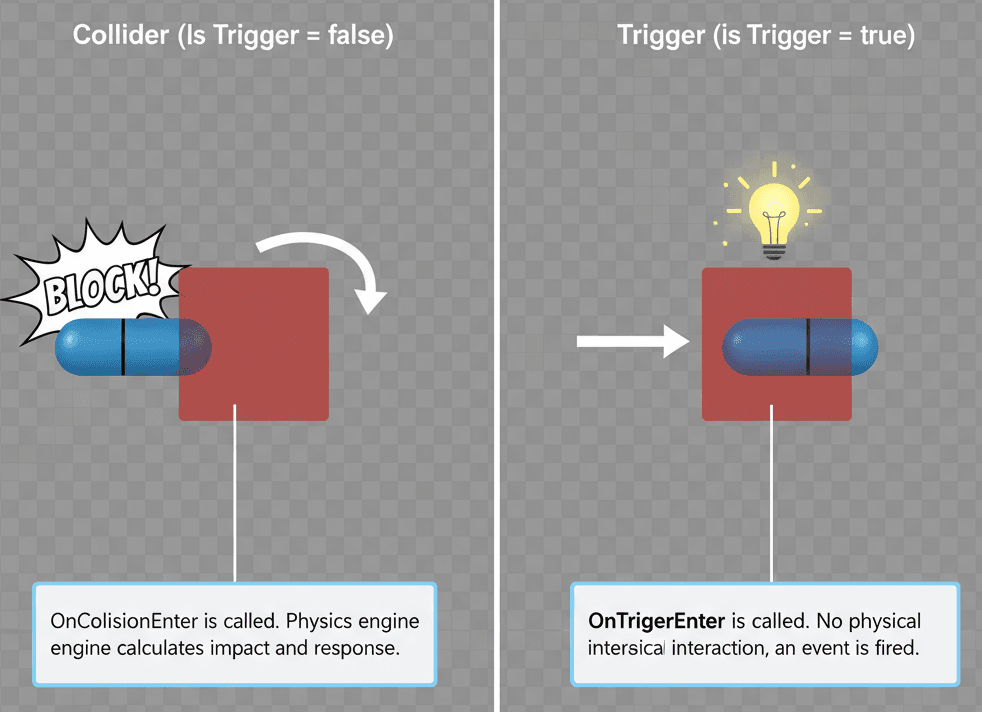
A Collider is like a solid wall - when something hits it, there's a physical interaction. The objects push against each other, bounce off, or stop completely. Think of a soccer ball hitting a goalpost.
A Trigger is like an automatic door's motion sensor. You walk right through the invisible detection field, but your presence starts an action - like the door opening, or in our case, collecting a power-up or entering a new area.
Both systems detect when objects meet, but one handles physical blocking while the other handles event-based detection. This distinction is absolutely crucial for creating the interactive experiences players expect in modern games.
The Building Blocks Every Game Developer Should Know
Before we dive into code, let's get our terminology straight. These are the core components you'll be working with:
Collider: This component defines the physical shape of a GameObject for collision purposes. It's invisible in the game view but essential for physics interactions.
Trigger: A special configuration of a Collider where the "Is Trigger" property is enabled. This allows detection of object overlap without causing physical collision.
Rigidbody: This component enables a GameObject to be affected by physics like gravity and forces. It's essential for collision detection between two moving objects.
Collision: An event that occurs when two Colliders (neither set as Trigger) make contact and exert physical forces on each other.
OnCollisionEnter / OnCollisionStay / OnCollisionExit: Script functions that Unity calls automatically when two Colliders begin touching, continue touching, and separate.
OnTriggerEnter / OnTriggerStay / OnTriggerExit: Script functions called when a Collider enters a Trigger volume, remains inside, and leaves the Trigger's volume.
Your First Line of Defense: OnCollisionEnter
When I teach students about collision detection, I always start with OnCollisionEnter because it's the most intuitive. This function gets called by Unity when your GameObject's Collider makes physical contact with another GameObject's Collider.
Here's exactly how I implement it in my projects:
3D Version:
using UnityEngine;

public class CollisionDetector3D : MonoBehaviour
{
    private void OnCollisionEnter(Collision collision)
    {
        // 'collision' contains information like the contact points and the other object's Rigidbody.
        Debug.Log("Collided with: " + collision.gameObject.name);
    }
}
2D Version:
using UnityEngine;

public class CollisionDetector2D : MonoBehaviour
{
    private void OnCollisionEnter2D(Collision2D collision)
    {
        // 'collision' provides details about the 2D collision event.
        Debug.Log("Collided with: " + collision.gameObject.name);
    }
}
The beauty of OnCollisionEnter is that it gives you detailed information about the collision itself - contact points, force, and the other object's Rigidbody. This makes it perfect for realistic physics interactions.
The Invisible Event Handler: OnTriggerEnter in Unity Colliders vs Triggers
This is where Unity Colliders vs Triggers really shows its power. OnTriggerEnter executes when a GameObject's Collider enters the spatial volume of another Collider marked as a "Trigger." I use this constantly for non-physical interactions like collecting items or entering special zones.
3D Version:
using UnityEngine;

public class TriggerZone3D : MonoBehaviour
{
    private void OnTriggerEnter(Collider other)
    {
        // 'other' is the Collider of the object that entered this trigger zone.
        Debug.Log(other.gameObject.name + " has entered the trigger zone.");
    }
}
2D Version:
using UnityEngine;

public class TriggerZone2D : MonoBehaviour
{
    private void OnTriggerEnter2D(Collider2D other)
    {
        // 'other' refers to the 2D Collider that has entered this trigger area.
        Debug.Log(other.gameObject.name + " has entered the 2D trigger zone.");
    }
}
When Should You Use What? The Real-World Comparison
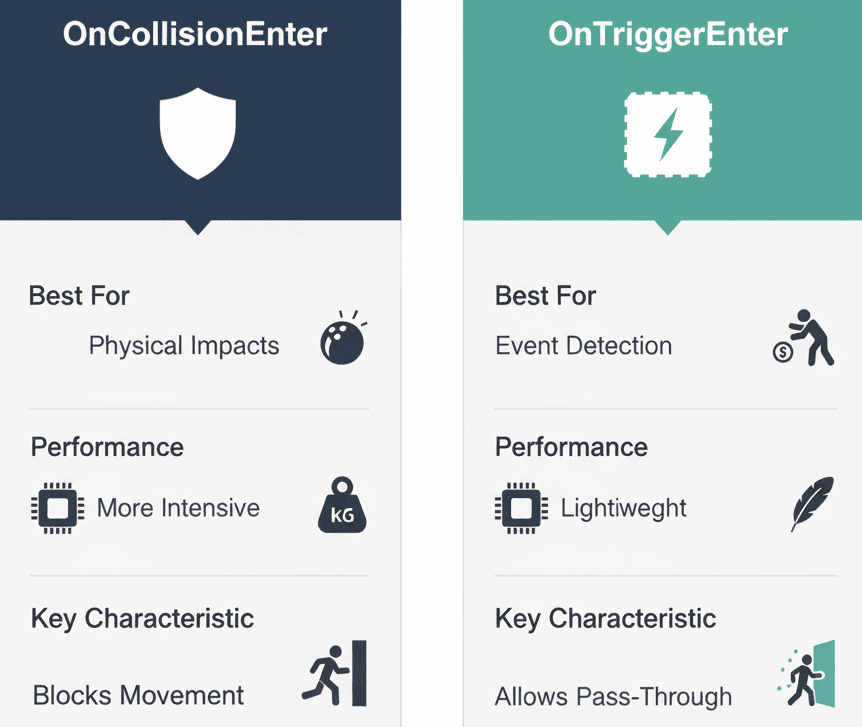
After working on dozens of Unity projects, I've learned when each approach works best. Here's my quick-reference guide:
| Criteria | OnCollisionEnter | OnTriggerEnter |
|---|---|---|
| Best For | Simulating physical impacts, like a car hitting a wall, a ball bouncing, or a character being blocked by an obstacle. | Detecting proximity for non-physical events, such as collecting items, entering a checkpoint, or activating a cutscene. |
| Performance | Generally more performance-intensive as the physics engine needs to calculate and resolve the collision forces between the objects. | More lightweight because it only detects the overlap of volumes without calculating any physical forces or responses. |
| Complexity | The implementation is straightforward for detecting the initial impact, but managing the resulting physics can add complexity. | The setup is very simple and is primarily used to initiate scripted events, making the logic often easier to manage. |
| Code Example | void OnCollisionEnter(Collision col) { if(col.gameObject.tag == "Wall") { Debug.Log("Hit a wall!"); } } |
void OnTriggerEnter(Collider other) { if(other.CompareTag("Player")) { Debug.Log("Player entered the zone!"); } } |
Why This Knowledge Will Transform Your Game Development
Mastering Unity Colliders vs Triggers opens up incredible possibilities for your games. From my experience, this is what changes:
Enables Interactive Environments: This is your first step toward making game worlds feel alive and responsive to player actions. Every interactive element you can imagine starts here.
Creates Core Gameplay Mechanics: Fundamental actions like picking up items, dealing damage on contact, or reaching finish lines all build upon these systems. You literally can't make engaging games without understanding this.
Improves Performance with Correct Usage: Understanding when to use lightweight Triggers instead of performance-heavy Colliders is crucial for smooth-running games. I've seen student projects go from choppy to silky-smooth just by optimizing their collision detection.
Separates Physics from Logic: This distinction allows for cleaner, more maintainable code by handling physical interactions and gameplay events in separate, dedicated functions.
Pro Tips That Actually Matter (From Someone Who's Made These Mistakes)
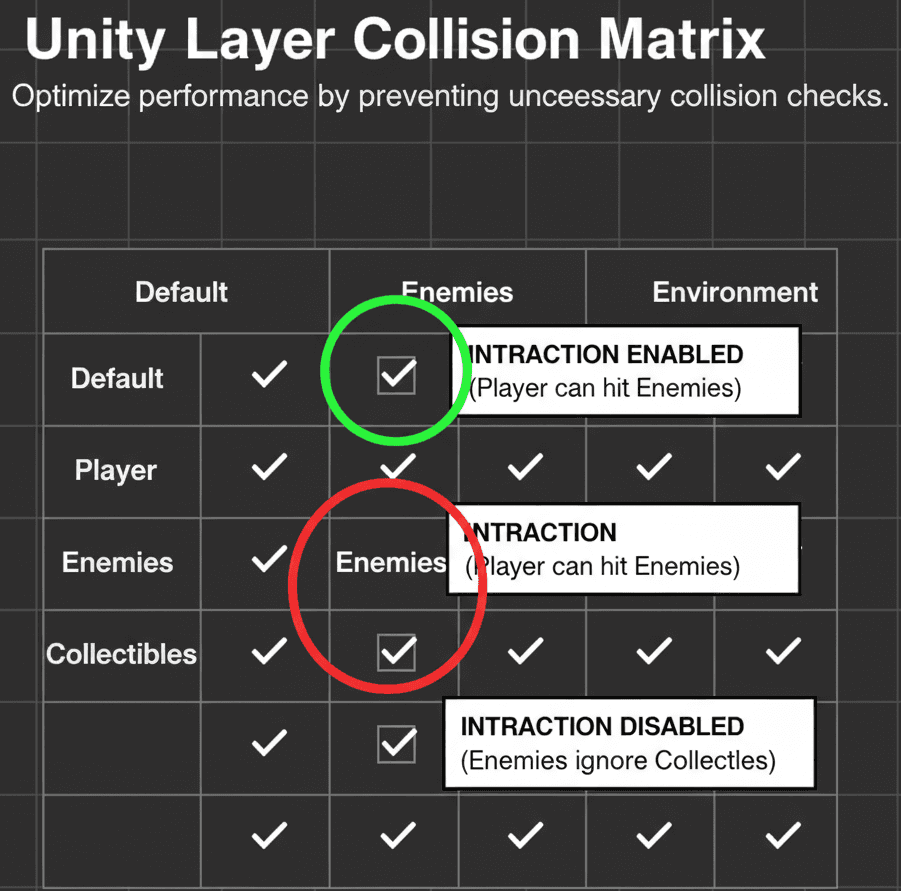
Here are the optimization techniques I wish I'd known from day one:
Use Layers to Filter Collisions: Instead of checking tags in your code, use Unity's Layer Collision Matrix to define which object layers can interact. This approach is significantly more performant than tag checking.
// This Raycast will only hit objects on the "Enemy" layer.
int layerMask = 1 << LayerMask.NameToLayer("Enemy");
RaycastHit hit;
if (Physics.Raycast(transform.position, transform.forward, out hit, 100f, layerMask))
{
    Debug.Log("Hit an enemy: " + hit.collider.name);
}
Attach Rigidbodies to Moving Objects: For the physics engine to correctly detect collisions and trigger events between two objects, at least one must have a Rigidbody component. This caused me countless headaches before I figured it out.
Use Primitive Colliders for Performance: Whenever possible, use simple shapes like Box, Sphere, and Capsule Colliders instead of Mesh Colliders. They're much less demanding on the processor and work better for most gameplay scenarios.
How The Pros Do It: Three Games That Got It Right
I've analyzed countless games to understand how professional developers implement these systems. Here are three brilliant examples that every student should study:
The Legend of Zelda: Breath of the Wild - Seamless Area Transitions
I find the shrine and Divine Beast entrances fascinating from a technical perspective. Link entering these locations uses large, invisible Trigger volumes. When the player's Collider enters this Trigger, OnTriggerEnter fires and initiates area transition logic - loading the new level and displaying the area name.
What makes this brilliant is the seamless experience. Players get clear feedback about entering important areas without hitting invisible walls. It's elegant collision detection at its finest.
Super Mario Odyssey - Satisfying Collectibles
One of my favorite implementations is how Mario collects Power Moons. Each Power Moon has a Collider set as a Trigger. When Mario's character controller overlaps with the Power Moon's Trigger, OnTriggerEnter increments the count, plays celebration effects, and destroys the GameObject.
The genius here is immediate, satisfying feedback. Players feel rewarded just by moving through collectibles, creating that addictive "just one more" feeling.
Among Us - Intuitive Interaction System
What I love about Among Us is how body reporting works. Living players have small Trigger Colliders around them. When this Trigger overlaps with a dead body's Collider, the "Report" button activates. The OnTriggerStay function continuously checks if the player remains in range.
This creates clear, intuitive interaction. Players understand proximity-based actions without needing tutorials or UI explanations.
Blueprint 1: Building Your First Collectible Coin
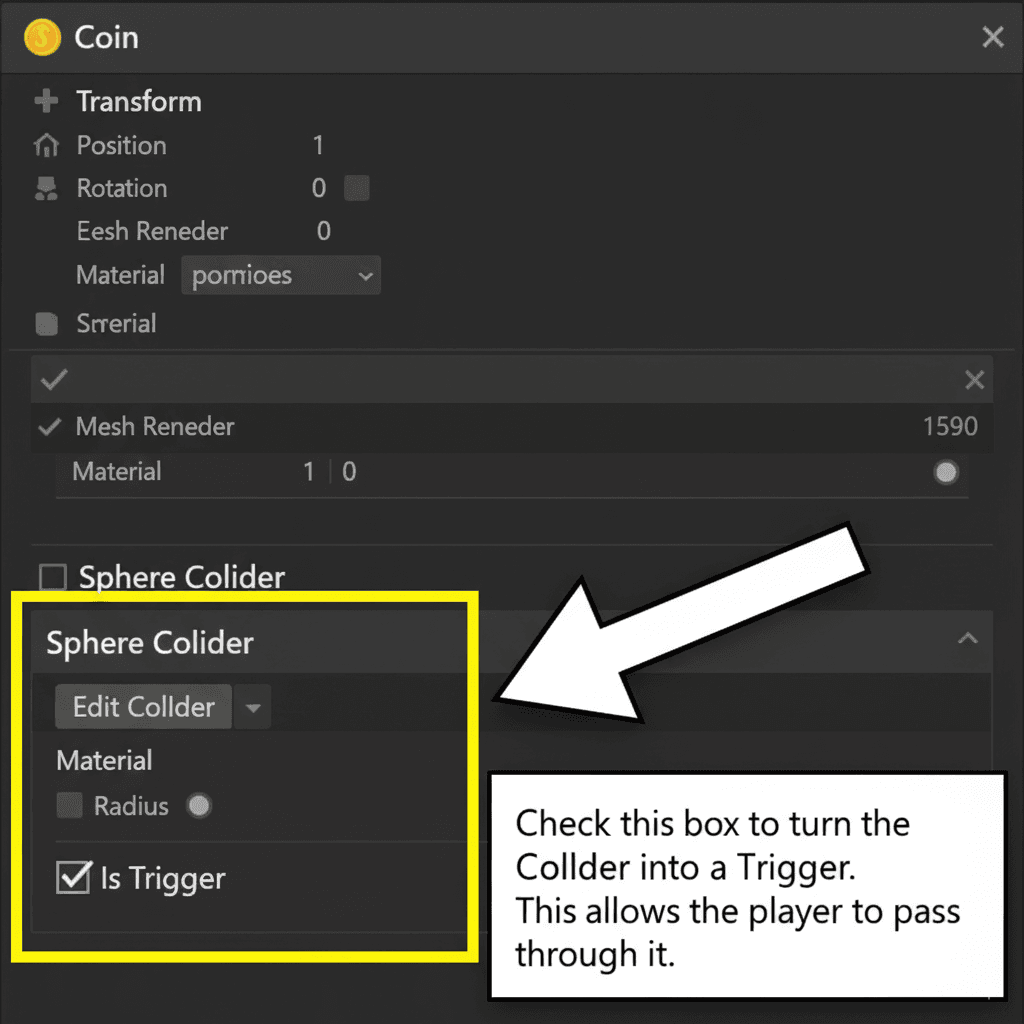
Let's build something practical together. This coin system is one I use in almost every beginner project:
Unity Editor Setup:
- Create a "Player" GameObject with a
Rigidbody(orRigidbody2D) and aCapsuleCollider(orCapsuleCollider2D). Assign it the "Player" tag. - Create a "Coin" GameObject using a Cylinder or Sprite. Add a
SphereCollider(orCircleCollider2D). - On the Coin's Collider component, check the "Is Trigger" box.
Step-by-Step Code Implementation:
Create a new C# script named Coin and attach it to the "Coin" GameObject:
// Coin.cs
using UnityEngine;

public class Coin : MonoBehaviour
{
    // This script will handle the coin's behavior.
}
Implement the OnTriggerEnter method to detect when something enters the coin's trigger volume:
3D Version:
private void OnTriggerEnter(Collider other)
{
    // Check if the object that entered has the "Player" tag.
    if (other.CompareTag("Player"))
    {
        Debug.Log("Coin collected!");
        // Destroy the coin GameObject this script is attached to.
        Destroy(gameObject);
    }
}
2D Version:
private void OnTriggerEnter2D(Collider2D other)
{
    if (other.CompareTag("Player"))
    {
        Debug.Log("2D Coin collected!");
        Destroy(gameObject);
    }
}
Blueprint 2: Creating a Damage Zone That Actually Works
Environmental hazards are essential for challenging gameplay. Here's how I implement damage zones that feel responsive:
Unity Editor Setup:
- Create a "Player" GameObject with a
Rigidbodyand aCollider. - Create a flat Cube or Plane for the "Lava" floor.
- Add a
BoxColliderto the Lava object, adjust its size to cover the desired area, and check the "Is Trigger" box.
Step-by-Step Code Implementation:
Create a new C# script named DamageZone and attach it to the "Lava" GameObject:
// DamageZone.cs
using UnityEngine;

public class DamageZone : MonoBehaviour
{
    // This script will manage the damage-dealing logic.
}
Implement the OnTriggerStay method, which is called every frame an object remains inside the trigger:
3D Version:
private void OnTriggerStay(Collider other)
{
    // We can try to get a Health component from the object that's inside.
    PlayerHealth playerHealth = other.GetComponent();

    // If the object has a PlayerHealth script, deal damage.
    if (playerHealth != null)
    {
        // We would call a method on the player's health script here.
        // For now, we'll just log a message.
        Debug.Log("Player is taking damage from the lava!");
    }
}
2D Version:
private void OnTriggerStay2D(Collider2D other)
{
    PlayerHealth playerHealth = other.GetComponent();
    if (playerHealth != null)
    {
        Debug.Log("Player is taking damage from 2D lava!");
    }
}
Blueprint 3: Making Objects Bounce Like They Should
Physical interactions add so much life to games. Here's my go-to bouncy surface implementation:
Unity Editor Setup:
- Create a "Player" GameObject with a
Rigidbodyand aCollider. - Create a "BouncyWall" GameObject using a Cube. Add a
BoxColliderto it. - Do not check "Is Trigger" on the wall's collider, as we need physical collision.
Step-by-Step Code Implementation:
Create a new C# script named BouncySurface and attach it to the "BouncyWall" GameObject:
// BouncySurface.cs
using UnityEngine;

public class BouncySurface : MonoBehaviour
{
    public float bounceForce = 10f;
}
Implement the OnCollisionEnter method to detect physical impact:
3D Version:
private void OnCollisionEnter(Collision collision)
{
    // Get the Rigidbody of the object we collided with.
    Rigidbody rb = collision.collider.GetComponent();

    if (rb != null)
    {
        // Calculate the bounce direction (away from the wall).
        Vector3 bounceDirection = collision.contacts[0].normal;
        // Apply an instant force in that direction.
        rb.AddForce(bounceDirection * bounceForce, ForceMode.Impulse);
    }
}
2D Version:
private void OnCollisionEnter2D(Collision2D collision)
{
    Rigidbody2D rb2d = collision.collider.GetComponent();

    if (rb2d != null)
    {
        Vector2 bounceDirection = collision.contacts[0].normal;
        rb2d.AddForce(bounceDirection * bounceForce, ForceMode2D.Impulse);
    }
}
Ready to Start Building Your First Game?
Understanding Unity Colliders vs Triggers is just the beginning of your game development journey. If you're excited to apply this knowledge and build complete, polished games, I'd love to help you take the next step.
At Outscal, we've designed comprehensive game development courses that take you from these fundamental concepts to creating professional-quality game experiences. You'll work on real projects, get personalized feedback, and build a portfolio that stands out to employers.
The difference between knowing the theory and shipping actual games is practice with expert guidance. Our students don't just learn concepts - they build, iterate, and deploy games that people actually want to play.
Your Next Steps Beyond Unity Colliders vs Triggers
Now that you understand the fundamentals of object interaction in Unity, here's what I recommend:
Practice these three blueprints in your own projects. Start simple - create a basic level with collectible coins, a damage zone, and some bouncy platforms. You'll be amazed how much gameplay you can create with just these building blocks.
Experiment with different Collider shapes and trigger combinations. Try creating invisible checkpoints, proximity-based enemy detection, or multi-stage interactive objects that respond differently as players get closer.
Study the games you love and try to identify where they're using Colliders versus Triggers. You'll start noticing these systems everywhere once you know what to look for.
Wrapping Up
Mastering Unity Colliders vs Triggers transforms you from someone who copies code to someone who designs interactive experiences. Whether you're creating physical impacts with OnCollisionEnter or event-based detection with OnTriggerEnter, you now have the tools to make objects communicate in meaningful ways.
The real magic happens when you combine these systems creatively. Every great game mechanic you've ever enjoyed - from collecting power-ups to environmental puzzles - builds upon these foundational concepts. Start practicing with the blueprints I've shared, and you'll be creating engaging interactive experiences in no time.
Key Takeaways
- Unity Colliders vs Triggers solve different problems: Colliders handle physical interactions while Triggers detect proximity for events
- OnCollisionEnter provides detailed collision information and is perfect for realistic physics interactions like bouncing or blocking
- OnTriggerEnter offers lightweight event detection ideal for collectibles, checkpoints, and non-physical gameplay mechanics
- Performance matters: Use primitive Colliders when possible and leverage Unity's Layer Collision Matrix for efficient filtering
- Rigidbody components are essential for collision detection between moving objects - at least one object needs physics enabled
- Layer-based collision detection outperforms tag checking and gives you precise control over which objects can interact
- OnTriggerStay and OnCollisionStay enable continuous detection for damage zones and persistent area effects
- Real games like Zelda, Mario, and Among Us demonstrate these concepts in action through seamless area transitions, satisfying collectibles, and intuitive interactions
Common Questions
Colliders create physical interactions where objects bounce off or block each other, while Triggers detect when objects overlap without causing physical collision. Think of Colliders as solid walls and Triggers as invisible motion sensors.
Use OnCollisionEnter when you need realistic physics interactions like bouncing balls or blocking walls. Use OnTriggerEnter for gameplay events like collecting coins, entering zones, or proximity-based actions.
At least one of your interacting objects needs a Rigidbody for Unity's physics engine to detect collisions and trigger events. Without it, the collision detection functions won't be called.
Add a Collider to your collectible object and check the "Is Trigger" box in the Inspector. Then use OnTriggerEnter to detect when the player touches it and destroy the object.
Triggers are more lightweight because they only detect overlap without calculating physics forces. Colliders require more processing power as the physics engine resolves forces and realistic interactions.
You can have multiple Colliders on one object - some set as Triggers and others as regular Colliders. This allows complex interactions like a character that can be touched (Trigger) but also blocks movement (Collider).
Primitive shapes like Box, Sphere, and Capsule Colliders are much more efficient for the processor to calculate. Use Mesh Colliders only when you absolutely need exact mesh-based collision detection.
Layer-based filtering prevents unnecessary collision checks between objects that shouldn't interact. This is more efficient than checking tags in code and gives you precise control over interactions.
OnTriggerEnter fires once when an object first enters the trigger zone. OnTriggerStay fires every frame while the object remains inside the trigger, perfect for continuous effects like damage zones.
Check that at least one object has a Rigidbody, verify Collider settings (Is Trigger checked for triggers), ensure objects are on appropriate layers, and use Debug.Log statements in your collision functions to test detection.